Account
Website Installation
Install Leadcheck on your website.
1. Copy the Leadcheck Javascript code to your clipboard
<script src="https://code.leadcheck.net/leadcheck.js?sid=LEADCHECK_SITE_ID" async></script>NOTE: Remember to change "LEADCHECK_SITE_ID" to your site ID.
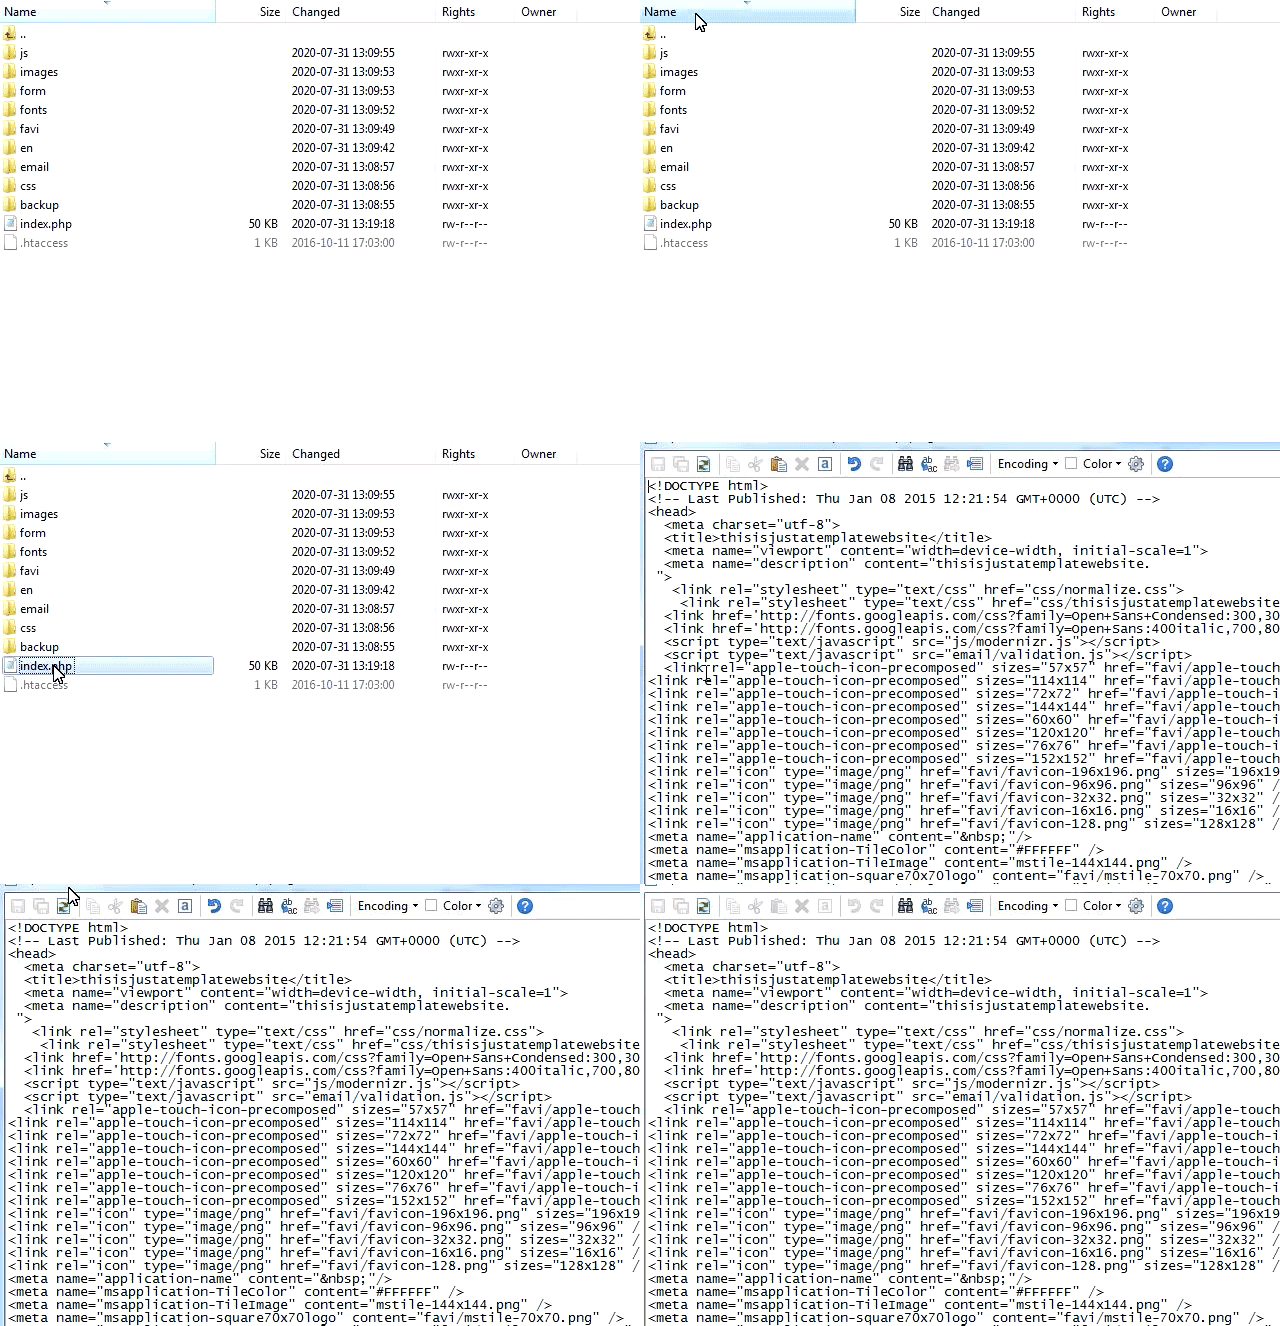
2. Open your website's backend
Access the server on which your website is hosted with the tool allowing you to modify the files, or log in to your respective platform Dashboard.
3. Locate the file that contains the </body> tag
While it might differ depending on how your website is built, the rule of thumb would be to search for the files with .html or .php extension. Usually, it’s going to be either index.html or index.php, but there might also be some additional subpages files. If you would have any doubts, please contact your web designer or respective platform support.

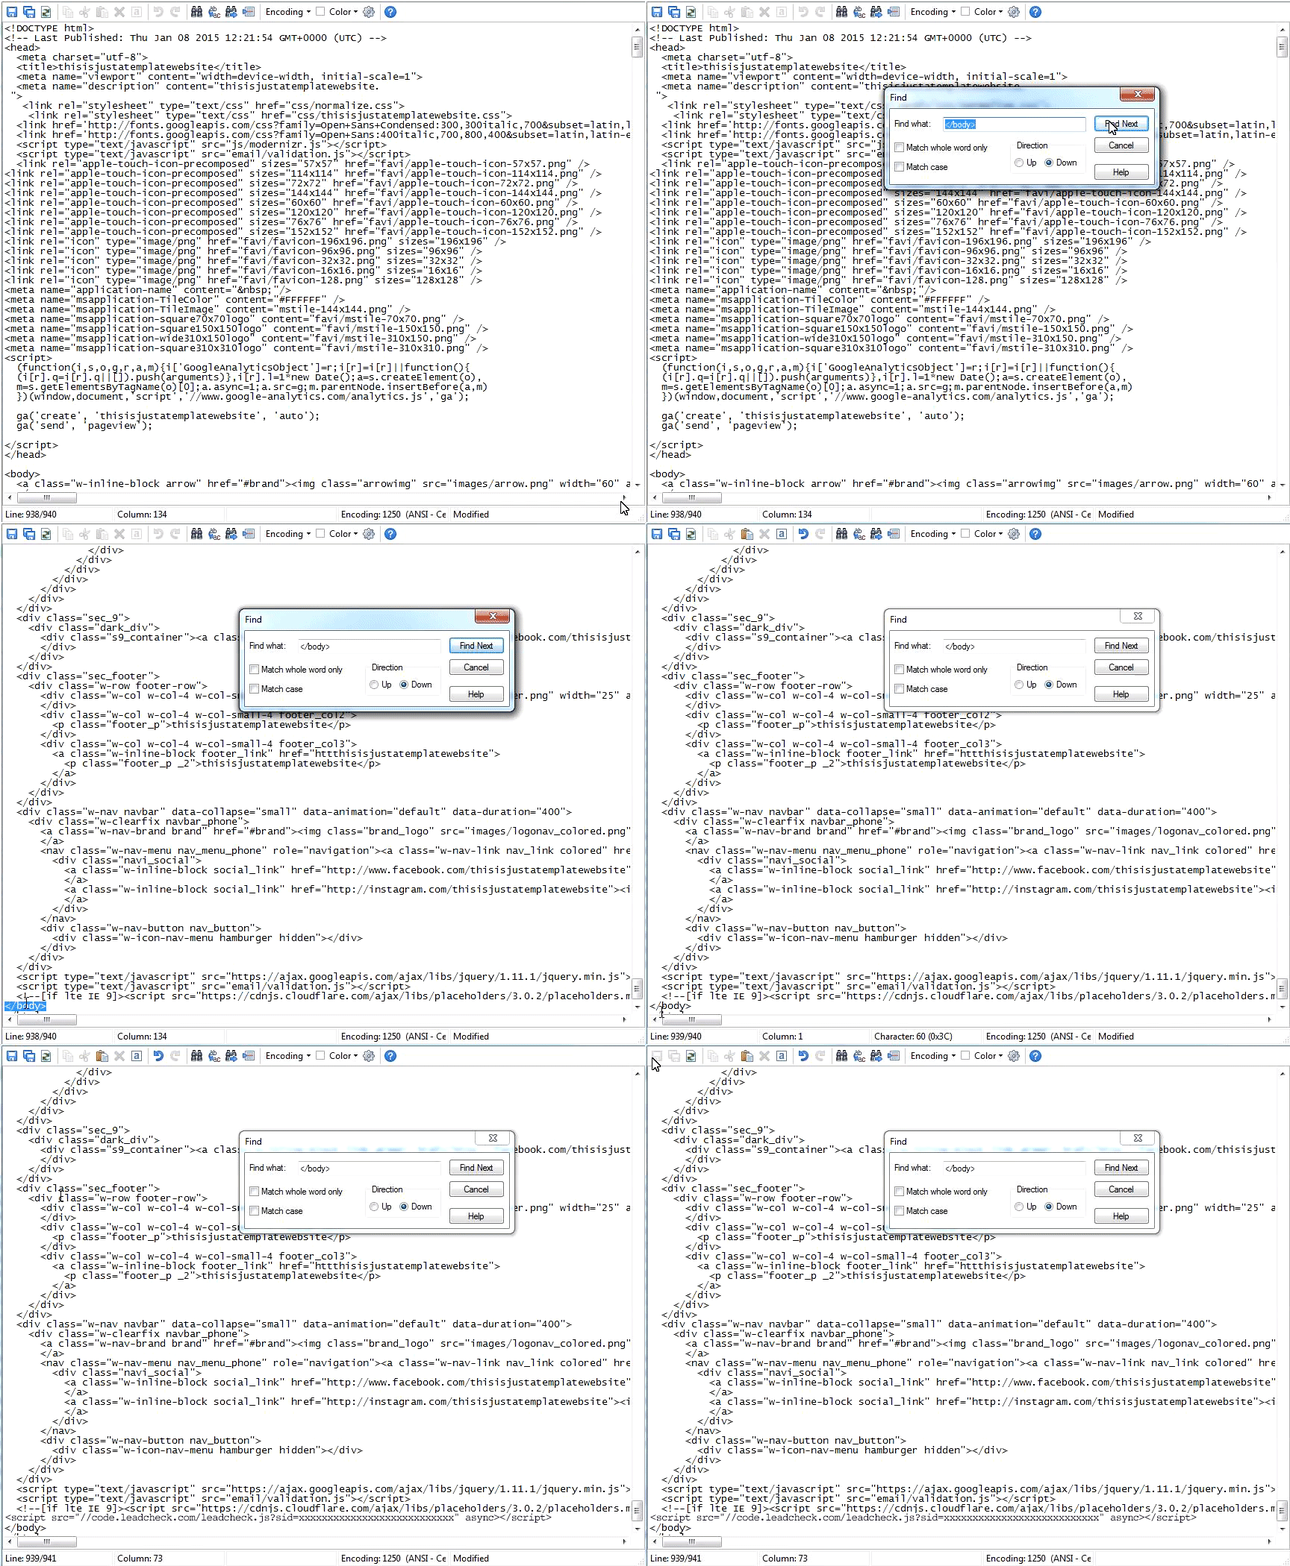
4. Find the </body> tag & add the javascript code to your website’s code
Use the search tool of your ftp client, or scroll down to the very bottom of the file to locate the closing </body> tag. Then, paste the copied JavaScript code snippet above the closing </body> tag of your website’s source code.

5. Remember to save the changes
Save the changes and that’s it!
Leadcheck is installed and ready to go.
