Account
Wix Installation
Install Leadcheck on your Wix website.
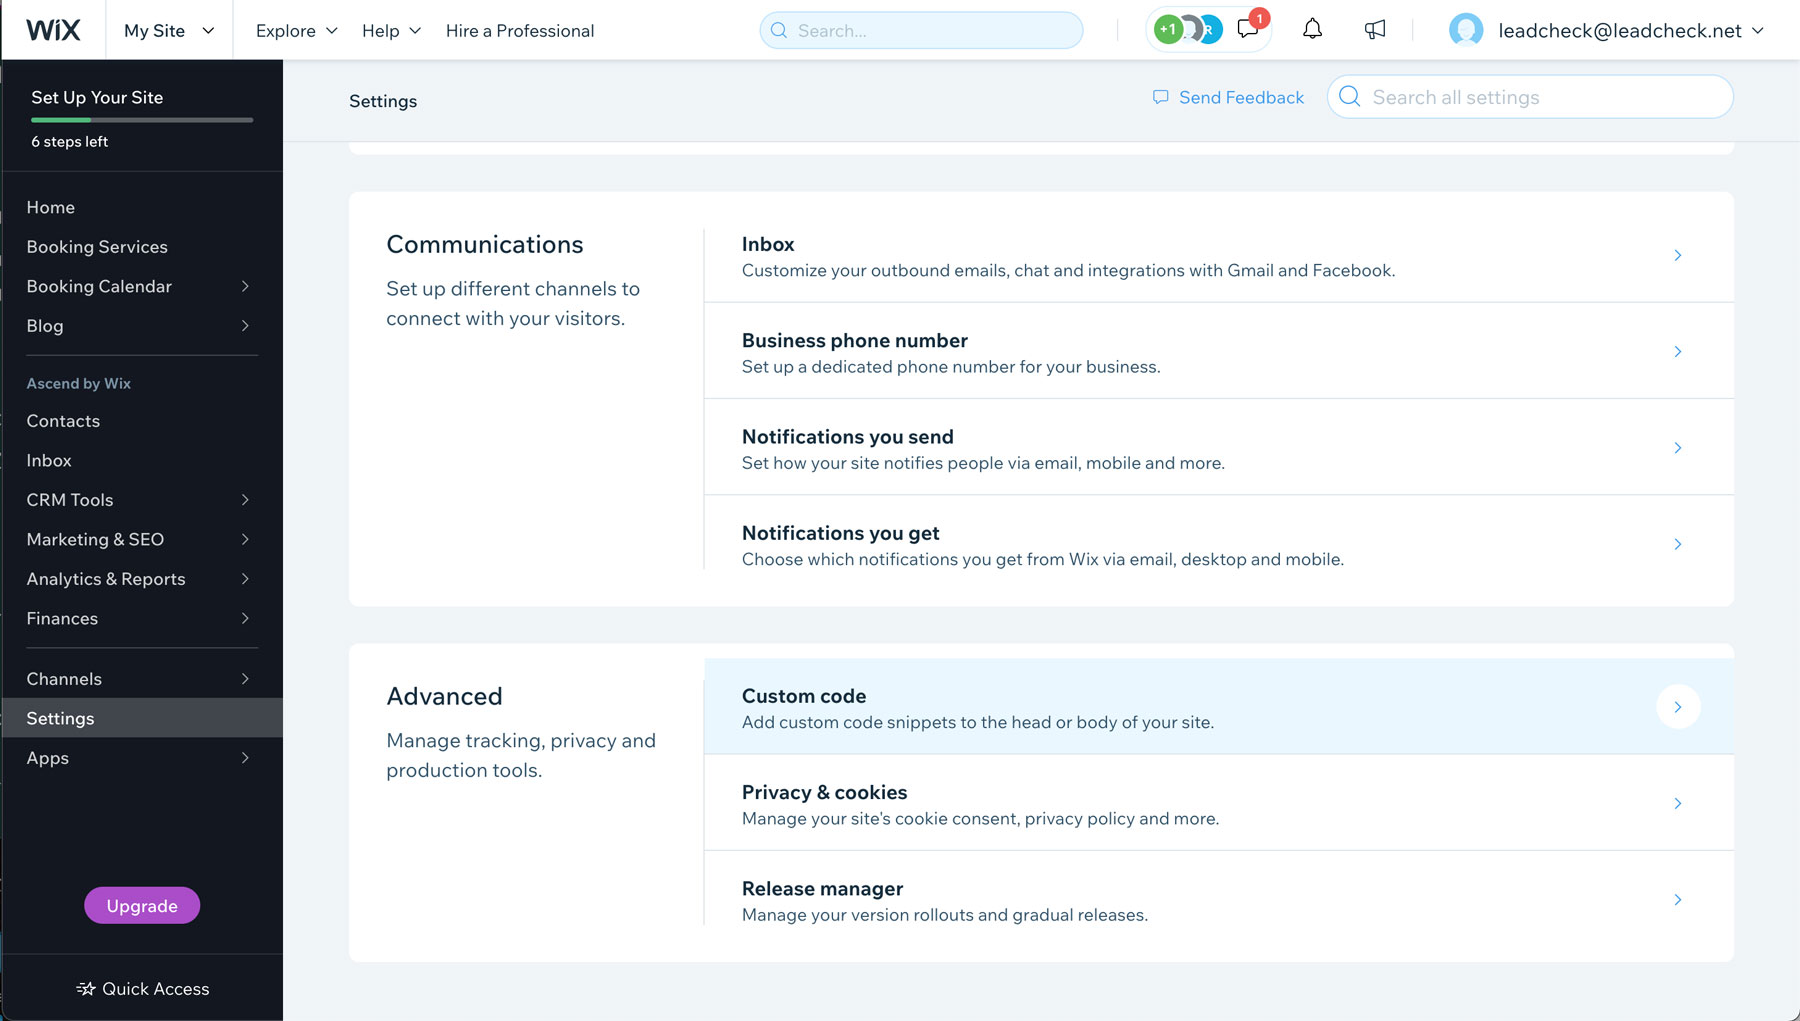
1. From your Wix site's dashboard, click on Settings.
2. In the Advanced section, click Custom Code.

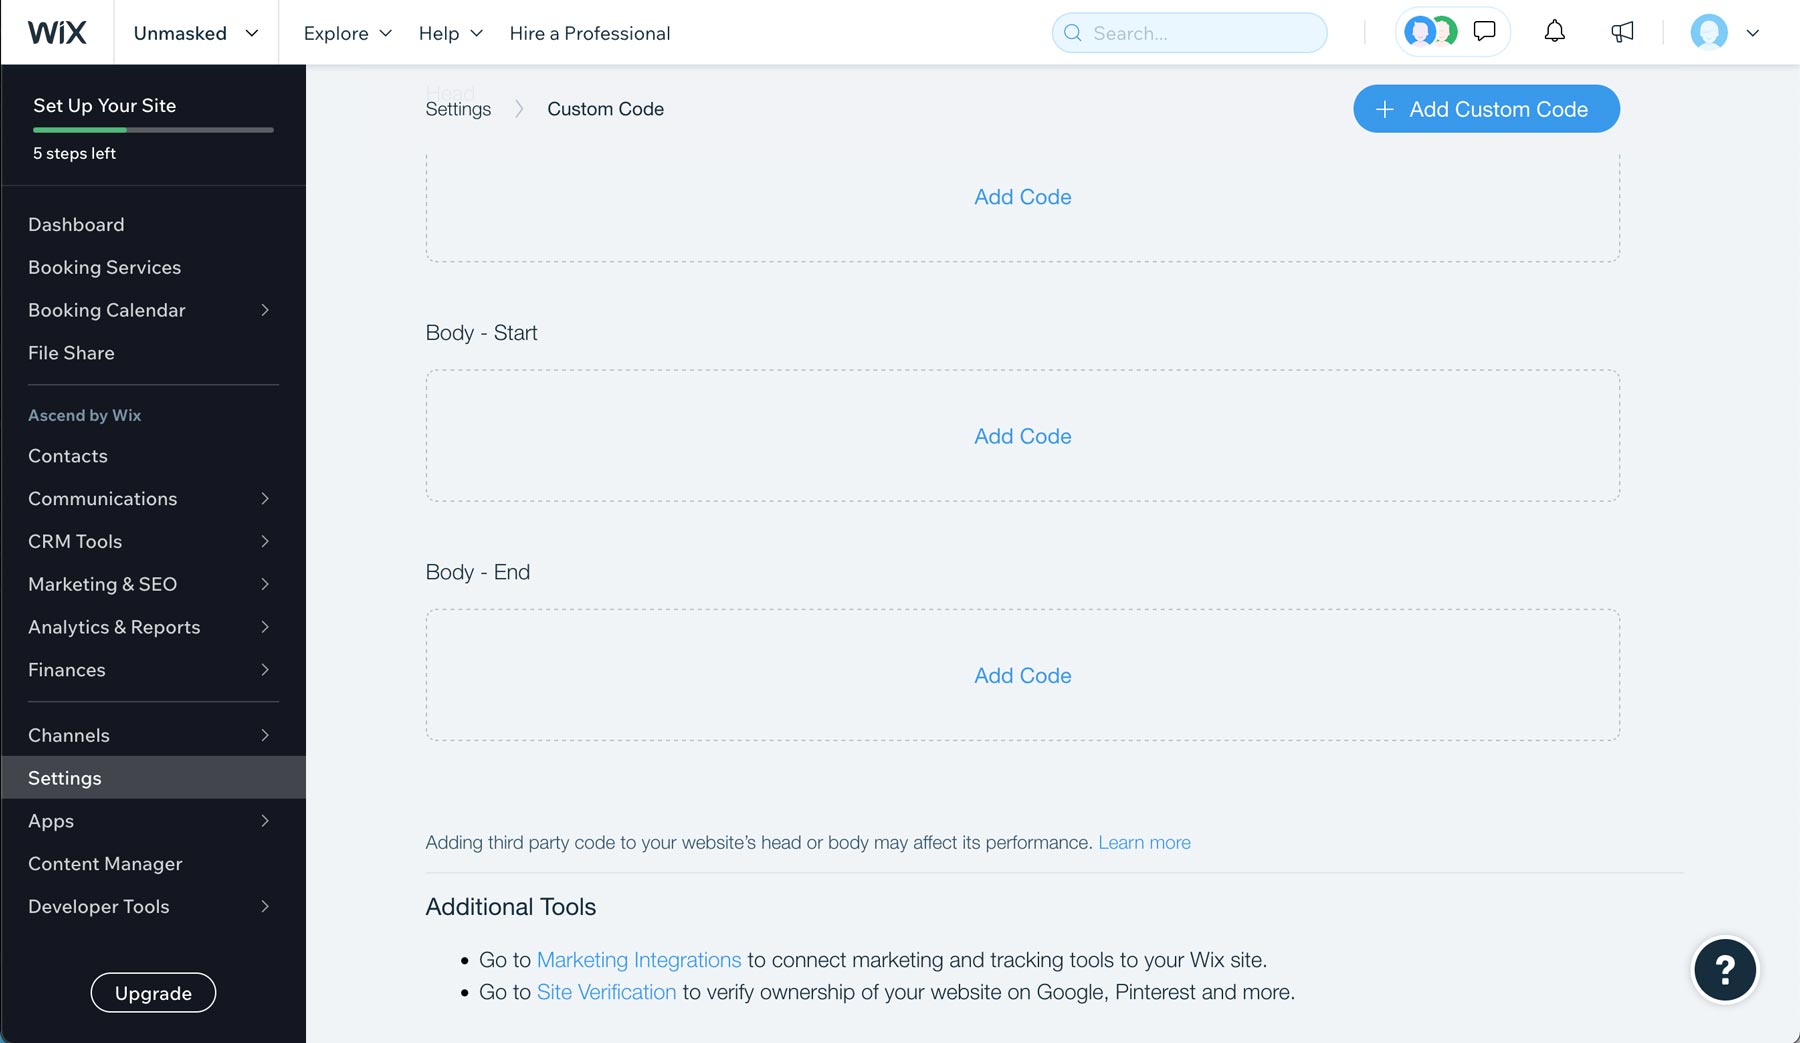
3. Click + Add Custom Code at the top right.

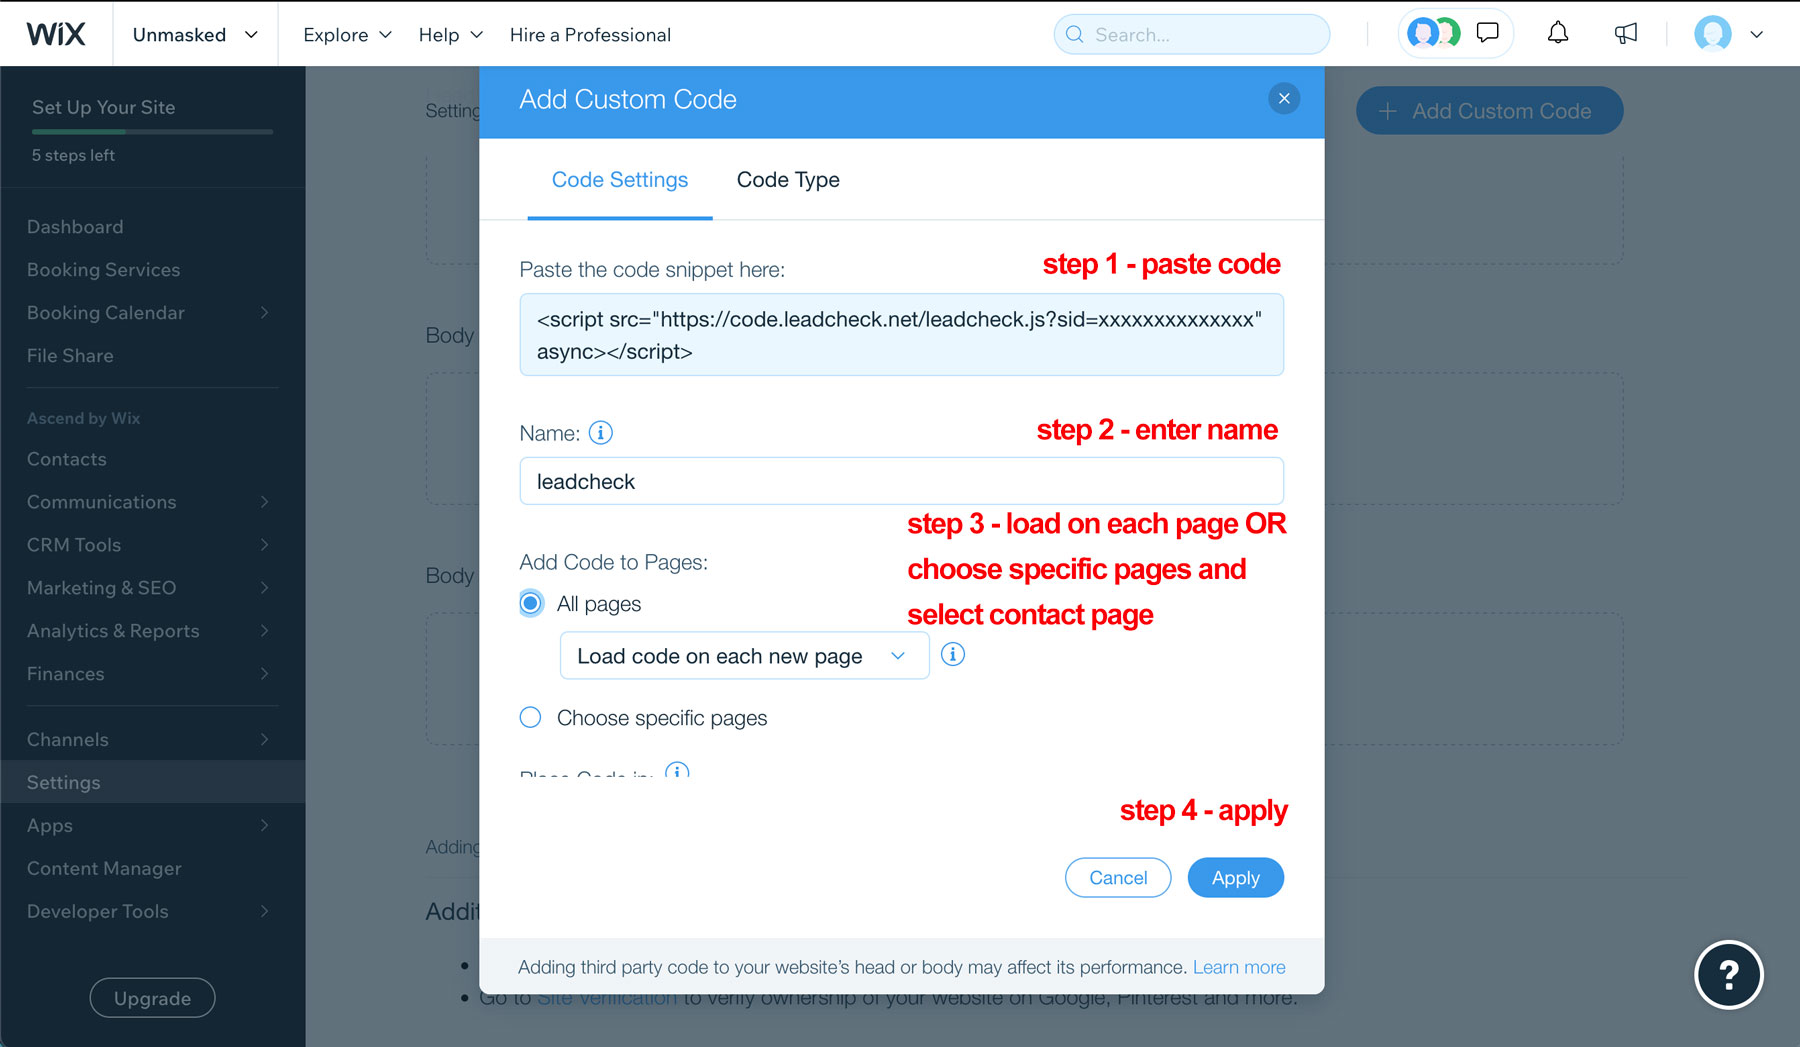
4. Copy the Leadcheck Javascript code to your clipboard
<script src="https://code.leadcheck.net/leadcheck.js?sid=LEADCHECK_SITE_ID" async></script>NOTE: Remember to change "LEADCHECK_SITE_ID" to your site ID.

5. Paste the code snippet in the text box.
6. Enter a name for your code.
Tip: Give it a name that is easy to recognize so you can quickly identify it later.
7. Select an option under Add Code to Pages:
Choose specific pages: Use the drop-down menu to select your Contact page.
8. Choose where to place your code under Place Code in:
Select: Body - end
9. Click Apply.
Leadcheck is now installed and ready to go.
